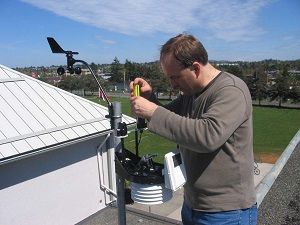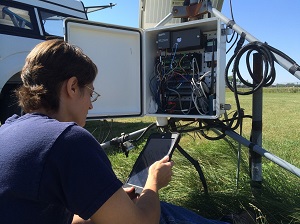
Proper installation of the weather station is vital. Installation of the weather station puts a significant impact on the accuracy of the data delivered by the weather station unit. Not only the assembling of the various equipment must be perfect, but also the location of the installation of the weather station must be equally good. As the weather station mostly consists of two units, the console, and the sensor unit, these must be adequately prepared and mounted correctly, so that the user doesn’t have to face any problems in future. Many users take professional help for the installation process, but some users like to do the job by themselves.
Here are some general guidelines and installation tips to help the inexperienced users in installing the weather station.
Location and sitting
Siting is the most critical part of the installation process of a weather station. It is the process of deciding the location of installing the weather station. To get accurate information from the weather station, one must be very careful while selecting the site. Siting affects the quality of the data much more than the quality of the equipment affecting the data. The weather station sensor unit should be placed 4:1 distance away from any tall objects. There should not be any tall trees that could provide shade to the solar panel of the weather station.
Temperature sensor
In the installation process of a weather station unit, misplacing of the thermometer is one of the most common errors. While installing, the following points must be kept in mind about the temperature sensor;
- The temperature sensor must never receive direct sunlight, and it must receive plenty of ventilation and should not be blocked from the wind.
- If the temperature sensor is placed on the rooftop then it must be installed 5 ft above the roof and also in case of ground mounting, the temperature sensor must be placed 5ft above the ground or the grass.
- The temperature sensor should be placed at least 50 ft away from any concrete surface.
- To avoid direct sunlight, one can use a radiation shield. The temperature sensor can be housed inside a radiation shield. The radiation shield should not be tiny, as too small radiation shield won’t allow airflow and it would create unnecessary heating. It is best to use a radiation shield with aspirator as this helps in ventilation inside the shield.
Humidity sensor
The humidity data provided by the weather station should be the same as general the humidity of the atmosphere of the particular location. The nearby plants, trees or water source can profoundly influence the humidity data quality and accuracy of the weather station, so it is recommended to place the humidity season at least 50 ft away from any trees, plants or water source.
Rain gauge
One should be very careful while installing the rain gauge, as there might be some nearby obstructions like buildings that can create problems. Due to the wind and the obstacle, the rain gauge can miss a lot of rain. To avoid missing rain due to the obstruction, the rain gauge must be placed at least 5 ft away from any obstacle. In case the object is only 5 feet exactly away from the rain gauge, then the height of the obstruction must not be more than 10 ft tall than the rain gauge, else the rain gauge needs be placed at a higher level.
Anemometer
One significant thing should be remembered is that the anemometer must be able to reflect the pattern of the wind as if it is placed on a clear field. The anemometer must be placed at least 10 ft above the ground. The more is the height of the installed anemometer, the better it is, and more will the accuracy of the data be. The anemometer must be the highest thing at the surrounding, and it must be at least 7 ft taller than the highest obstruction nearby.
Mounting
One should be very careful about the mounting of the weather station. It can be mounted in two ways, rooftop mounting and ground mounting;
Ground mounting
For attaching the weather station on the ground, one has to follow an important rule; the weather station needs to be installed four times the distance of the height of any tall wind obstruction. For example, suppose the height of the building is 25 ft, and anemometer is 5 ft off the ground, then the weather station must be placed 80 ft away from the building. For ground mounting, a lot of space is required. Some cabled weather station allows the anemometer to be mounted above and apart from the rest of the weather station unit.
Rooftop mounting
Rooftop mounting is an excellent idea as it has no such rules. One has to be extra careful while mounting the weather station on the roof, as there is a lot of risk in roof mounting. One might encounter serious injuries; there might also be roof leakage and rooftop installed weather station is very prone to lightning strikes. For rooftop mounting professional help is recommended.
Other factors
While preparation of the installation, there are some other important factors that one has to keep in mind
Heat sources
The sensor unit, as well as the console, must be placed away from any heat sources like heaters, chimneys, air conditioners, and exhaust vents. The sensors must be installed away from asphalt concrete, as the heat of the sun can be radiated from these surfaces. The heat from those units can profoundly influence the data accuracy of the weather station.
Lightning
Even if the lightning arrestors are being installed, direct or indirect lightning can damage the weather station. The cabled weather station can cause maximum damage inside the home if the path of least resistance is through the console. In lightning-prone areas, one must always install a lightning rod, connecting the mast of the rod to the earth ground. Contacting an electrician is recommended for better installation of the lightning rod.
Sprinkler heads
The unit must not be placed near any sprinkler head as the sprinkles might hamper the accuracy of the rainfall data and the water might also be forced into the housing of the sensors.
Birds and rodents
In cabled weather station, the rodents might chew through the cable and damage it permanently. To prevent the rodents from chewing off the wires, the cables must be run in an electrical conduit. In some cases, birds may make nests on the rain gauge, so the rain gauge should be mounted in an open space. One can also install spike strips around the rain gauge to keep away birds from building nests.
Level
It is best to use the bubble level on the top to ensure a perfect level installation. To provide accurate rain and wind measurements, the weather station sensor unit must be installed as level as possible.
Solar panel
The orientation of the solar panel is fundamental. The solar panel installed along with the sensor unit must be faced towards the south direction. For ensuring that the board receives as much solar energy as possible, this orientation is essential. One must keep in mind that if the weather station along with solar panel is being installed in the southern hemisphere area, then the panel must face towards the north.
Preparation
Preparation of the weather station unit is crucial.
Console
The batteries must be installed in the battery box of the console. Then it must be switched on and checked if all the keys are working.
Thermo-hygro sensor
All the parts must be assembled. The sensor must be placed inside the radiation shield to protect it from the sun in order to avoid unnecessary heating due to the radiation. Power should be supplied and checked if the sensor is communicating with the console.
Anemometer
For preparing the anemometer, first of all, the parts of the anemometer need to be assembled. The anemometer arm must be attached to the base of the anemometer. The wind cups have to be constructed and fixed using the hardware kit that comes along with the weather station unit. Power should be supplied to test the connection and also communication must be checked in the console.
Rain gauge
In case of the tipping bucket technology, before taking the rain gauge for installation, one must not forget to release the bucket in the rain gauge.
Installation steps
Here are the steps to install the sensor unit of the weather station
- First of all the battery cover of the base of the sensor must be removed. Then the batteries are to be inserted into the given space, according to the polarity diagram shown inside the battery box.
- The mounting must be fastened to the pole or the post using the screws that come along with the hardware kit.
- The sensors must be attached to the mounting base that has been fastened to the pole. The bubble level must be centered, and the sensors must be pointed in a proper direction.
- The recorded data during the installation must be erased from the consoled for accuracy.
Conclusion
When all the factors and location siting is done carefully, one can merely mount the weather station sensors to the pole by using the hardware kit that comes along with the weather station. Once everything is set, one can conduct some calibration tests for assurance, and finally, the unit is ready for the use.
